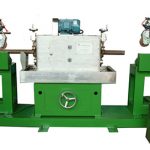
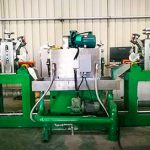
Wireless Transmission Steel Bar Ultrasonic Flaw Detector
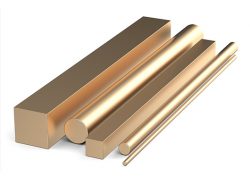
Steel bar is a conventional product with high density, moderate noise. The system is suitable for the automatic detection of internal and external defects of various steel bars.
The principle of UT ultrasonic flaw detection is that after the ultrasonic wave is coupled into the steel rod by water, the incident propagation will case ultrasonic reflection when there is a defect in the bar. The ultrasonic instrument will alarm the ultrasonic reflected signal after the amplified signal to realize the automatic detection of the defect.
Wireless Transmission Steel Bar Ultrasonic Flaw Detector Brief Introduction
1. Probe configuration on spindle section 1
There are two probe regulators in section 1,180 degrees apart. Each regulator is equipped with a two-channel combination of ultrasonic line focus probes, and the transverse wave incident clockwise.
Detection of defects: detection of round subcutaneous defects in a rounded clockwise direction
Center frequency: 5.0MHz ± 10%
Coupling method: water immersion method
Quantity: 2 sets of probes, each set consisting of 2 combined wafers, which are evenly distributed in the circumferential direction of the workpiece, 180° apart, on the same section. A total of 4 independent channels.
2. Probe configuration on the main shaft section 2
A total of 2 probe adjustment frames are placed on section 2, each separated by 180°, and a 2-channel combined ultrasonic line focusing probe is arranged on each adjustment frame, and the longitudinal wave is incident.
Detection of defects: metallurgical defects inside the steel bar,
Detection range: center transverse hole.
Center frequency: 5.0MHz ± 10%
Coupling method: water immersion method
Quantity: 2 sets of probes, each consisting of 2 combined wafers. These 2 sets of probes are evenly distributed in the circumferential direction of the workpiece, 180° apart, and there are 4 independent channels in the same section.
3. Probe configuration on the main shaft section 3
A total of 2 probe adjustment frames are placed on section 3, each separated by 180°, and a 2-channel combined ultrasonic line focusing probe is arranged on each adjustment frame, and the transverse wave is incident counterclockwise.
Detection of defects: counter-clockwise detection of round subcutaneous defects
Center frequency: 5.0MHz ± 10%
Coupling method: water immersion method
Quantity: 2 sets of probes, each consisting of 2 combined wafers. These 2 sets of probes are evenly distributed in the circumferential direction of the workpiece, 180° apart, and there are 4 independent channels in the same section.
Defect detection standard
GB/T4162-2008 Ultrasonic testing method for forged steel bar.
Wireless Transmission Steel Bar Ultrasonic Flaw Detector Parameters
Channel number
12 channels
Flaw detection speed
30m/min
Total gain
100dB,step0.5dB
Working mode
Single probe transmitting, receiving or double probe transmitting and receiving respectively
Sensitivity margin
≥50dB
Resolving power
≥26dB
Dynamic range
≥30dB
scan range
0~5000mm
Frequency range
0.5~20MHz
Sampling range
250MHz
Repetition range
Single channel100Hz~4KHzadjustment
Vertical linearity
≤2%
Horizontal linearity
≤1%
Detection mode
Full-wave, positive half-wave, negative half-wave
Gate setting
Each channel has three gates, A and B are defective gates and C are interface tracking gates.
Alarm indication
Color Display and Sound Alarm of A, B and C Gate Alarm on Each Channel
Delayed alarm
Two path,delay time 0.1-10s,step 0.1s
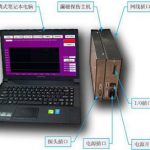
Waveform storage, unlimited number, waveform playback, printing and report generation.

